What is Tuya IoT platform
Tuya is a large platform for IoT , here there are many options Tuya has own devices also from here you can connect that devices. It gives a platform to a developer to make its own devices by changing firmware also so this thing make it very interesting for developers.
It also has SDK(Software Development Kit) which doesn’t required a specific platform and operating system. And this SDK implemented in C language it only need to support TCP/IP protocol stack and provide the necessary system dependent interfaces of the SDK to complete the integration. So Raspberry pi is better to Implement this thing but there are others way also but in this article we will implement or connect Raspberry Pi with Tuya IoT platform so let’s start.
This image show the connection with Raspberry Pi

Connect with Raspberry Pi
First we have to go Tuya IoT Platform for login ,if you don’t have account on Tuya just create it otherwise fill the details and login your Tuya IoT Platform
There is link for this Platform click here

After login you will get an option ‘Go to IoT platform’ click on this and you will see this interface which is given below.

And this will take you on IoT platform where you will get many options to create a product, click on create button and here we are going to search for raspberry Pi and to Implement SDK we will click on ‘can’t find the category’ and proceed further.

Then you will get this type of interface fill all information here as given above. After done this click on create button this will take you on ‘Function Definition’ page and here click on ‘Add’ button of Custom function’ as given below in the images follow this.

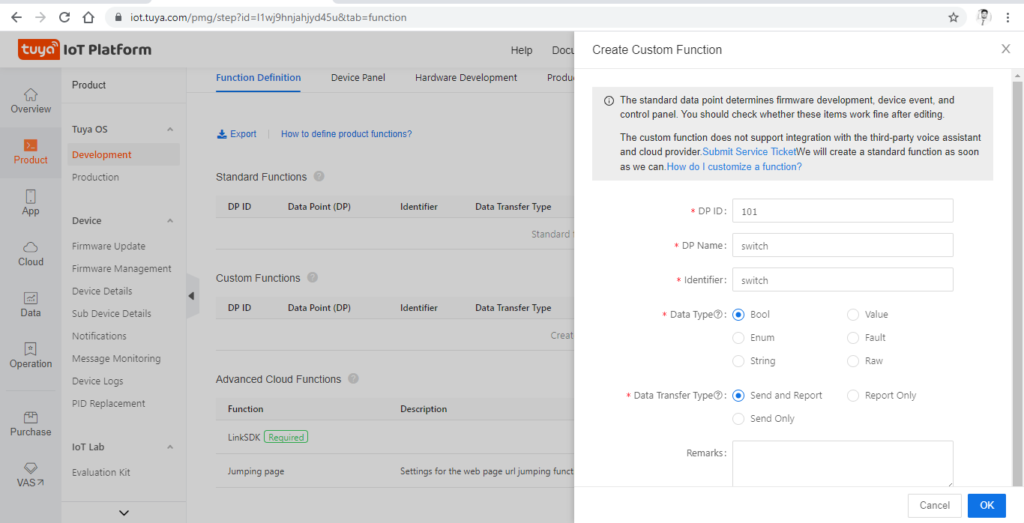
After this you will get a page of create custom function and fill all information here as given in below.
Click OK on this page then go to ‘Device Panel’ from here you have to select Tuya smart app interface for the mobile application for this go to below on this page and you will get option like this as given below.

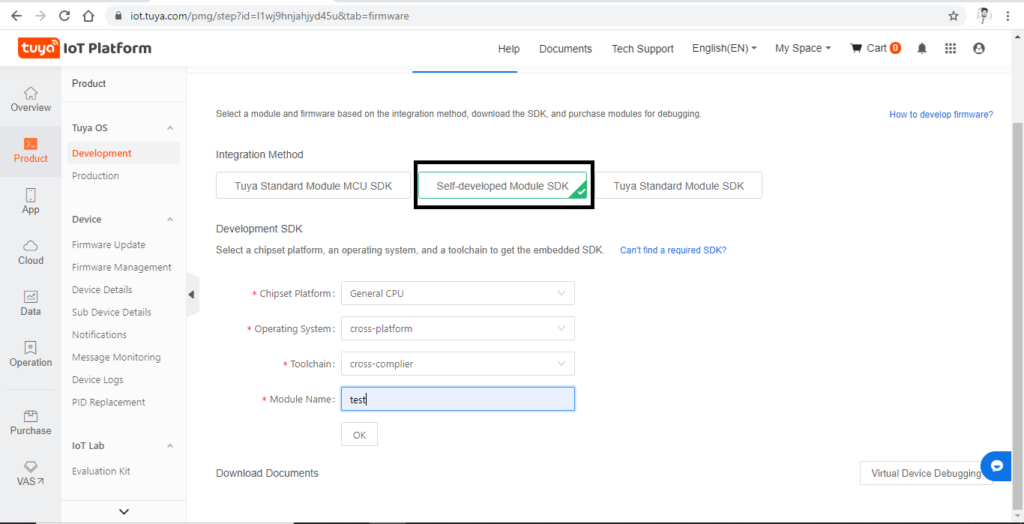
For this we will required an application with the help this we will device on that application and the name of this application is ‘Tuya Smart’ go and download this and this is available for both Android and IOS also. After apply this interface click on ‘Hardware Development’ and you will get option here for the development of SDK and for Raspberry Pi we will select ‘Self development Module’ click on it and fill all information as given below in the image.
After click on OK you will get option s for download the SDK file and get 10 free license list so go for first download the License list and after done this License part you will get an option for the download the License list so click on this and you will get list like this save it now this is going to be used for further steps.
Now go to that download SDK page and you will get all the steps for to connect or run SDK on Raspberry Pi ,and here we have mentioned all the steps which we are going to run in Raspberry Pi see the below image.

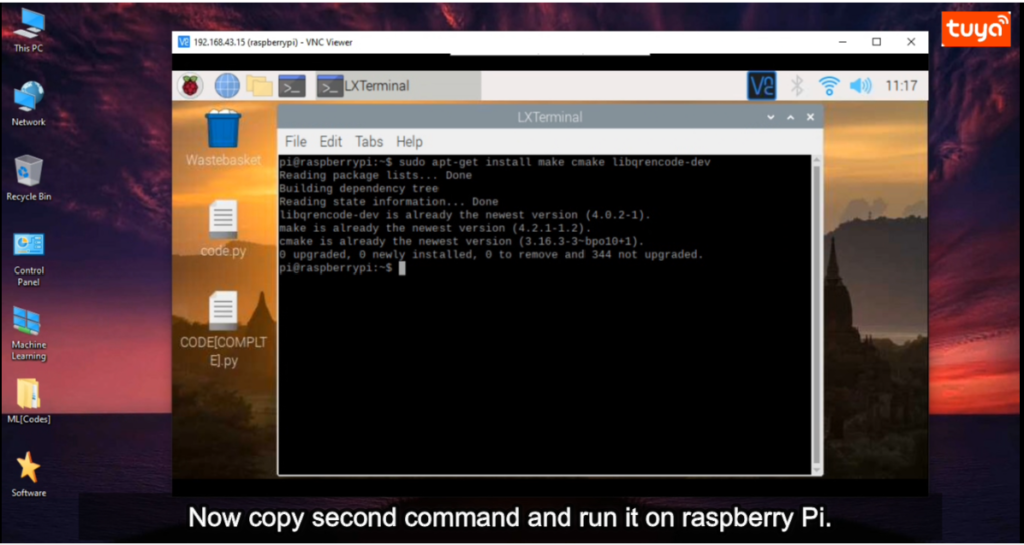
Now connect Raspberry Pi using VNC and open the Terminal of Raspberry Pi to Run First command as shown given below.
First Command
sudo apt-get install make cmake libqrencode-dev

After this run this command run second command which is given below.
Second command
git clone https://github.com/tuya/tuya-iot-link-sdk-embedded-c.git –recurse-submodules
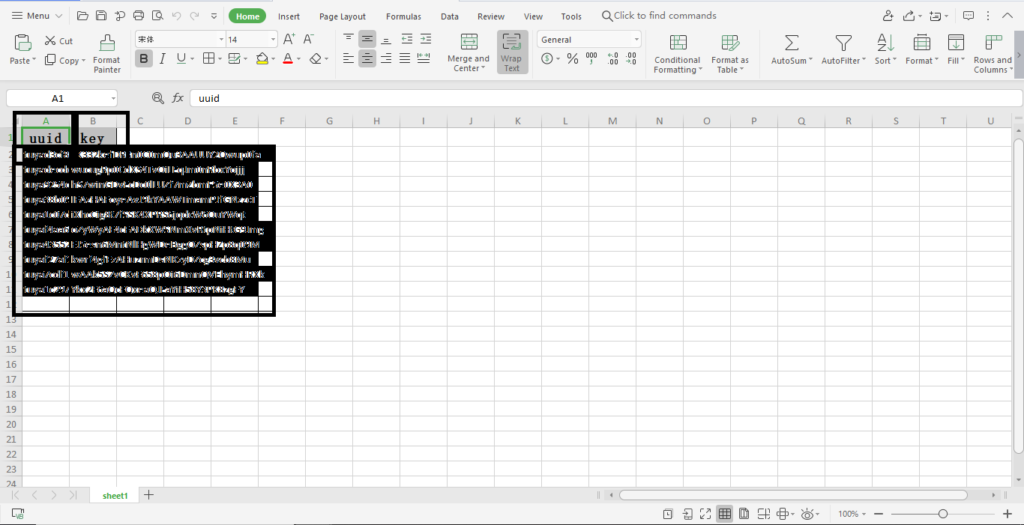
After this you will find a folder ‘tuya-iot-link-sdk-embedded-c’ in Raspberry pi now open that folder and open it then go to ‘examples’ folder then go to ‘switch_demo’ folder here you will get ‘tuya_config.h’ file open it, because we have to enter uuid and key values in this file uuid and key you will get from that License file which we have downloaded.
Follow the below image to enter the uuid and key value in ‘tuya_config.h’.

After done this don’t forget to save the file now let’s move further and run third command , but before this we have to change path of terminal of Raspberry Pi , for this go to ‘tuya-iot-link-sdk-embedded-c’ this folder and copy of this address and then go to terminal window and run this command.
cd paste your address here
Then enter and you will find that you are in folder ‘tuya-iot-link-sdk-embedded-c’ after this we will run third command to proceed further.
Third Command
mkdir build && cd build
After this you will see this type of screen as given below.

Hardware connection & Code for Led
As we are using here an LED as a device so for this we have to do some changes in demo file which is present in example folder. For the gpio access we are using here simple method that is here we will direct execute the terminal command for the gpio in that demo code ,let’s do the required changes.
For ON and Off a LED we are using gpio pin number 25 ,so we will access this gpio pin through direct command . And you can connect the LED as given below in the circuit diagram.

Now open ‘switch_demo.c’ file and go to ‘Hardware switch control function’ and do the changes as given below in the code section.

Now save this file after done all changes.
Fourth Command
cmake ..
After this command run fifth command and this will take some time
Fifth Command
make

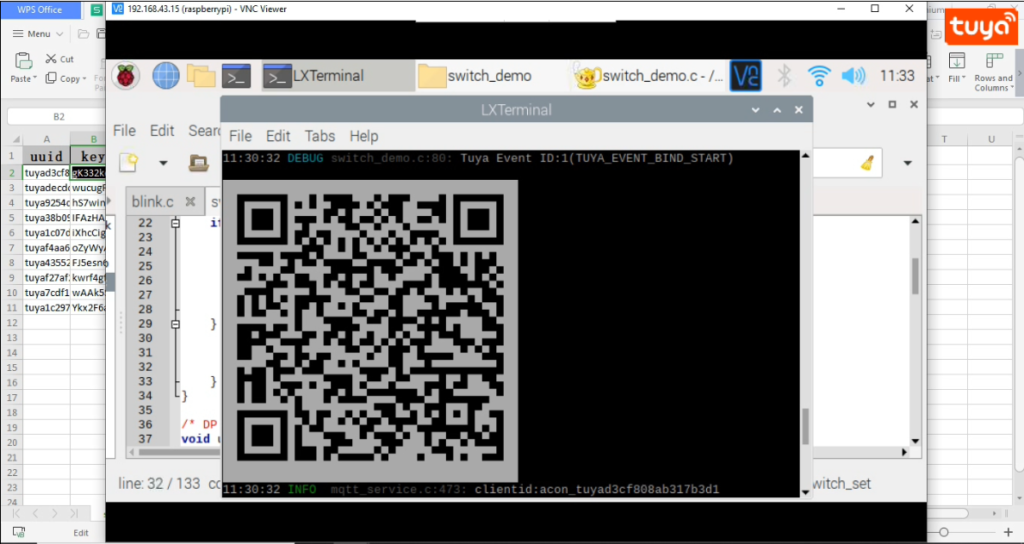
After done this you will get this screen and then Run this demo command. After this you have to open ‘Smart Tuya’ application and scan that QR-code which you will see on your terminal window. See the image below you will get like this interface on your terminal window.
Now you are able to switch ON or Off LED with ‘Smart Tuya’ application. See the result in below video.
Output Video
There is YouTube video also available for this project if you have any confusion with it please see the video you will more clear about this project.
YouTube Video